Wednesday 27 February 2013

NOTD color club harp on it + decals

Hi all, I hope you're all well. Massive flooding all along the coast here so I hope everyone that is effected is keeping safe!

Today I'm going to show off some decals I made using water slide decal paper. It is really easy to do, very time consuming but it's easy and looks great.

Here is a picture of my decal sheet, although quite a few are missing already.


I would also recommend cutting your decals out before painting your nails or you might accidentally shove the scissors into your nicely painted nails and end up with something like this...


Don't mind the icky acetone soaked cuticles, I didn't moisturise before taking the photos.

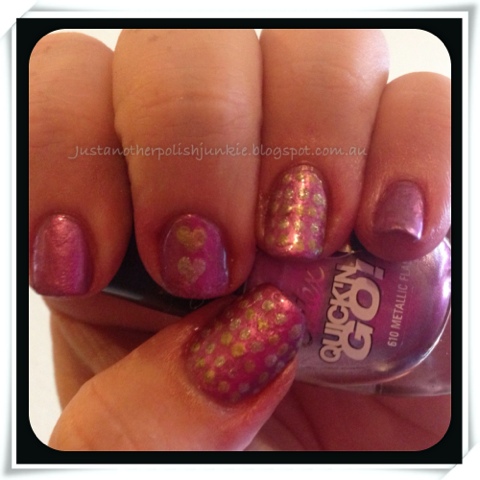
All in all though I am pretty happy with how this turned out. I love the fact that I can personalise my nails with just about any picture I want. Creating the decals is a bit tricky and takes forever but it is worth it in the end. I've taken a few different pics, one that shows all the decals then I've done more of a close up in a couple of different photos.


I hope you guys like them as much as I do, I couldn't get the color club to show how pretty it really is because these photos were taken at like 2am, plus it's been constant rain here since Thursday so no sunshine to show how amazing this colour really is!

Have you done your own decals before? If you have I'd love to check them out. Leave me a link in the comments!

Be safe everyone! Bye for now,

- Naomi

Tuesday 26 February 2013

Tape art mani tutorial

Happy Saturday all! Today I have decided to do a tutorial for you all. I made this mani with the help of some sticky tape and craft scissors so thought I would share with you all.


First you need a roll of sticky tape, I just used normal scotch tape but you can give whatever you have a go as long as its wide enough. You also need some craft scissors, you know the ones you use for scrapbooking that cut patterns in the paper, you can pick them up fairly cheap from craft supply stores. You will also need a base coat, a top coat and 2 different polish colours. I used ulta3 elegant mauve and ulta3 orchid.


You need to be really patient with this mani because if your base colour isn't totally dry when you try to pull the sticky tape off it will rip your base colour up (I learnt this the hard way :( ) I did my base colour and let it dry overnight (with a top coat) before using the tape the next morning.

Cut your sticky tape using the craft scissors so it leaves a pattern in the tape then stick them to your nails. Wherever you want, I put mine in the middle of the nail. Paint one side with your second colour and then pull the stick tape off. Do this for all your nails and then apply a top coat. It's as easy as that! It looks like you've done something difficult when you really haven't. If you guys try it please leave me a link in the comments, I'd love to check them out.


And on that note, I'm out. We're having some crazy weather here at the moment. Flooding and wild winds. I hope it's a bit nicer wherever you are :)

Bye for now,


- Naomi

Thursday 21 February 2013

Polish hearts <3

Evening lovelies!

I tried a little something new today, I made little polish hearts using a dotting tool. They're really cute and actually so simple! I avoided doing them for valentines day because I thought they were going to be hard, but totally not! If you're avoiding them too I recommend giving them a try, they are so easy. I used this tutorial from Rebecca Likes Nails .

The base colour I used was Cutex metallic flash. The dots and hearts are ulta3 gold rush fever and ulta3 envy.

Here are some pics. Sorry for so many similar ones but it was hard to choose one that showed everything off nicely!


If you have a nail polish blog please leave me a link in the comments, I love to check out other blogs for ideas and inspiration :)

Thanks for reading! Bye for now xx

- Naomi

Monday 18 February 2013

NOTD china glaze

Evening all :) I am going to start off by saying I love me some china glaze! The first one I ever bought was strawberry fields and it is still one of my all time fave polishes!

Tonight I decided to jazz it up with some luxe and lush, also one my all time favourites, although it is quite thick and annoying to apply it is definitely worth the extra effort! I think it may be one of the first ones I'm going to have to replace. I've only had it a month or so and it's already half empty!

So, just a quick one tonight while I sit here watching Glee :)

What's your favourite thing to do while painting your nails? For me, it's watching tv, although I get distracted and miss half the show which also kinda sucks lol...

Bye for now!

- Naomi


Saturday 16 February 2013

Ulta3 Saran Wrap

Happy Saturday all :) my favourite day of the week!

Today I decided to try something new, a Saran Wrap (or cling wrap for anyone who doesn't know what Saran Wrap is, which was me a few weeks ago!).

I have never done this before and I gotta say, it is super easy and looks really nice! I chose 2 purple shades to do this but I think really contrasting colours would look pretty amazing too!

For my base colour I used ulta3 orchid and for the "marbled" top coat I used ulta3 elegant mauve.

Start out by doing a base coat (I use Sally Hansen nylon + retinol strengthener, which isn't really a base coat but it works for me, it does not stop staining though!). Then put your base colour on, however many coats it takes for it to be opaque. I used 1 coat of ulta3 orchid. You need to wait for it to completely dry before going on to the next step. Once it is dry do a coat of your next colour (this is where I used ulta3 elegant mauve). You need to be quick now, and only do one nail at a time! While the top colour is still wet take some loosely balled up cling wrap (or Saran Wrap, depends where you're from) making sure that it isn't smooth, it needs to have texture to it. Lightly dab the ball on to your wet nail. This will take some of the polish off which then leaves a lovely marbled look on your nails. Do this to each nail one at a time then finish it off with a top coat, i used Sally Hansen insta-dri anti chip top coat. Be creative, there are so many different combinations you can use! Here are some pics of mine.


If you do some of your own I'd love to see them. They are just so pretty and simple to do, I don't know why I didn't try it before!

Thanks for reading guys, I hope you have an awesome weekend :) family BBQ here this weekend.

Bye for now!

- Naomi

Thursday 14 February 2013

Hooray for nail mail!

I got home today to discover nail mail in my mailbox! I was rather excited about this because it was my much awaited color club holo! It was so hard to only choose one but since I'm on no buy at the moment I had to restrain myself. In the end I went with harp on it.


Of course as soon as I walked in the door I had to try it out. I love it! It goes on so easy and only takes one coat, I used 2 though just to see if it would make a difference. I then decided to do an accent nail of max factor fantasy fire and china glaze luxe and lush.

I had to do 5 coats of fantasy fire because it is so sheer. Normally I would layer it over something else, usually ulta3 hollywood, however this time I didn't decide to do the accent till after I had used color club so just put it over that.

I'm hoping to get some better photos in sunlight because its raining today but this is what I managed to get, it really doesn't do this colour justice. It is gorgeous!!!


Thanks for reading :)

Bye for now, Naomi

Monday 11 February 2013

NOTD Ulta3 over the rainbow

Afternoon all! I hope you are all having a fabulous Monday.

Today's NOTD is ulta3 spring break topped with ulta3 over the rainbow.

Spring break is a gorgeous deep purple creme but it was so messy to apply! I only did one coat of this colour and it was opaque but looked very streaky. Once it dried though it was fine.


I then topped it with 2 coats of over the rainbow. I'm pretty sure I'm in love with this colour right now! It is packed full with loads of different colours and sizes of glitter in a clear base. It goes on really easy too. Only thing I don't like is how hard clean up is with glitter. It sticks everywhere, but you get that with any glitter. Here is a couple of photos, the first one is after one coat the next two are after two coat, in shade and sunlight.


Now on to a different subject. On Wednesday night I am going away for the night, do I take polish supplies or not? It's only for one night, I will be coming back home on Thursday but I hate chipped polish so at any little chip I will take it off and do something else. What would you do? Leave me a comment with your advice :)

Bye for now!

- Naomi

Sunday 10 February 2013

NOTD - Glittery skittles

I'm going to jump right in with my first NOTD post.

I've been feeling very uninspired lately and I just keep reaching for the same old polishes, even with quite a few untrieds in my stash so I decided to do something I thought I would never do, skittles!

I tried to use as many untrieds as I could.

Thumb is ulta3 - orchid topped with ulta3 - over the rainbow
Index is chi chi - I'm so hot right now (I think! It came in a gift box set and had no name on it) topped with ulta3 - red glitter
Middle finger is chi chi - merman (same as above, not 100%) topped with ulta3 - luck of the Irish
Ring finger is nails by Laura - stupid lamb topped with china glaze - luxe and lush
Pinky is ulta3 - fruit punch topped with color club - fame and fortune.


All in all it turned out pretty well and I got to try quite a few untrieds.

Bye for now :)

- Naomi


Welcome :)

Hi all, thanks for checking out my blog! I am extremely new to the blogging world so please be gentle with me. If you have any suggestions for my blog, or anything you would love to see on here, please let me know.

To start off I'm going to tell you a little about myself. My name is Naomi, most call me Nai. I am 26yrs old (27 in march eeeeeeekkkkk). I am a wife, a mother, a daughter and a sister. I am also addicted to nail polish! I must admit, this whole nail polish addiction is new for me. I used to be a sewer, I would sew several times a day, then in September 2012 I hurt my back (bulging disc for anyone who is interested) which has meant I can no longer sit at my sewing machine for hours on end because any chair that isn't a recliner causes me a whole lot of pain.

Since I could no longer sew I was itching to get creative but couldn't decide what I wanted to do. One day I was visiting a forum and there was a topic about what you do whilst waiting for your nail polish to dry. This got me interested and I went to the bathroom and dug out the single solitary bottle of nail polish I owned. By this time it was early October 2012. Since then my collection has grown from one bottle of polish to 58... Yep, just a bit addicted!

Anyways, I won't continue to bore you :) I plan to use this blog mostly for NOTD, I may occasionally review polishes and blog about other stuff.

I hope you enjoy my blog. You can also find me on Instagram @naibabi

- Naomi